Posts

Showing posts from September, 2011

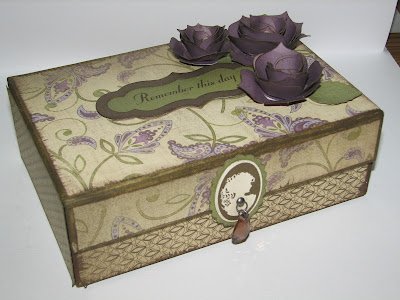
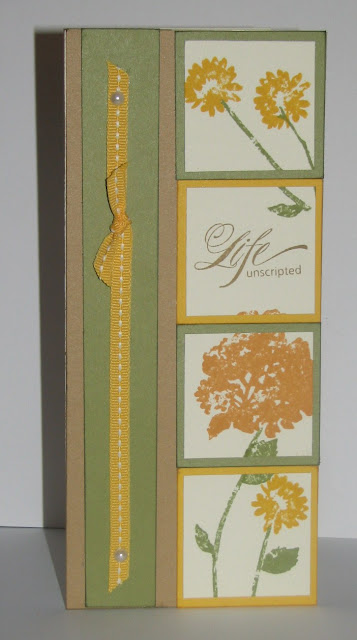
A Little Holiday Magic in October!

Image
Welcome to our Stamp of the Month Blog Hop!   We will be featuring October's SOTM,  Holiday Magic,  a set of 18 stamps.  If you have come here from   BETH NAUMANN'S BLOG ,  you are on the right path! The blog hop is a great big circle, so you can start here and work your way all around.    If you get lost along the way, you’ll find the complete list of participating consultants  here .   This month we have over   50 Close To My Heart Consultants  sharing their creations using this month's SOTM and other great CTMH products on their blogs. Following the blog hop is simple to do - just click on the link at the end of the post on each blog to move to the next one! Here we go! Christmas in October you say?  Actually October is the perfect month to get this stamp. If you love to make your own Christmas cards, you can get started early.   I have to say, it was a little hard for me to start these cards since I've been in such a 'Fall Mode' lately.  But once I st

A Snowflake Sentiment

Image
If you read my post the other day, you know I was getting tired of making fall cards!  I've got some really pretty winter and Christmas themed paper that I've been wanting to play with not to mention a bunch of new stamps to go with them!  So, to ease into the winter/Christmas season I decided to start with winter card with ONE snowflake.   But get ready.... for the next few weeks this one snowflake will bring on more wintery cards! I'm submitting this card for 2 Challenges this week - Heart 2 Heart and Mojo Monday .  Over at H2H the challenge is the make a card with only one stamp - and that stamp must be a sentiment ONLY.  Mojo Monday provided the sketch that I cased for this card.   I had a choice of round or square so I went with the square sketch. Here is the sketch: My Card: For this 6x6 Card I used White Daisy, Crystal Blue and Petal Cardstock.  I used a snowflake from the Top Coats Icing Overlays (Z1468) layered on top of a snowflake I cut on Crystal Bl

Make It From Your Heart Contest Winner

Image
With each new Idea Book that Close To My Heart releases, consultants get a chance to submit artwork showcasing new products.  There are several categories.   Winner's are selected by Close To My Heart and each piece of art is showcased on Close To My Heart's main website under the category - Ideas & Inspiration > Make It From Your Heart Art Gallery.   I'm always in awe of the artwork that is selected.  We have some VERY TALENTED consultants out there and I have never considered myself as talented as most.   I debated on submitting my project and 3 days before the deadline, I decided "What the heck I'll submit it."  So I did. August 31st was long past and here we are half way through September.   I decided that I didn't get selected.   I came home from work to an empty house - no one home but me.  My husband is out of town and my daughter off doing her Friday night teen thing. It's just me and my dog Remi.    I checked my email and I see the su

My Last Fall Card!

Image
I'm about over Fall already!  Not the weather... it's finally cooling off from the HOT August/September days we've been having.   But I've been creating fall cards out the wazoo lately and I think I created my last two this past weekend!  I can tell the leaves have all fallen off that tree in my brain.   I combined the sketch from  Clean and Simple Stamping  and the challenge from  Cas-ual Fridays  - create a CAS project using a least 3 shades of a monochromatic color PLUS brown!     Clean & Simple Stamping Sketch #159      Here is my last Fall card for the season..... My monochromatic colors are New England Ivy, Olive and Olive in 2nd generation stamping.  I used Chocolate ink to contrast.   The stamp is from Harvest Happiness (C1463).   I sued Olive twill ribbon from the Designer Ribbon Green Collection (Z1616) and a little pewter buckle from Foundry Metal Accessories - Ribbon Slides (Z1460).   Of course, I had to use my Art Philosophy cricu

Sending You.....CANDY CORN!

Image
I couldn't resist Play Date Cafe's  colors.                                                            I searched around for a stamp that would remind me of fall but I didn't want leaves.  I came across  Joyful Jar .  It had candy corn on it!  Candy Corn means FALL to me!  I have this rule.... never buy Candy Corn before October 1.  Well, I've already broke that rule.   Actually twice already .  Really not sure why I have that rule - I never abide by it.   I played around with the base of the card switching out colors. I really had a difficult time.   Even set it aside and left the room.  Thought a break might do me good.  Maybe even eat a little candy corn.  I wasn't sure that I would ever come back to it.  But, I did come back today and decided to finish it.  (I Hate leaving unfinished projects!) Joyful Jar is a really cute stamp.  Not only can you fill your jar with snowflakes, you can fill it with presents, snowflakes, leaves, hearts and mo

It's a Masculine Card for Another Friday Mashup!

Image
How appropriate... I actually got to the Friday Mashup on a Friday!   I set out to do 6 different challenges tonight (although I KNEW I wouldn't get to more than 2 completed!) The rules for Friday Mashup are simple.... Use the sketch and / or make is Masculine.   So I did both!  I love this sketch!   I sat down and thumbed through my new stamps trying to find one that would be masculine enough.   (This challenge has shown me that I need more masculine stamps.)  I pulled out the  Typeset  (X719B) paper for this card and used the stamp  Key Moments  (B1392) for this 6x6 card.  The card base is Kraft Cardstock. A closer look at the watch -  Paper - Typeset Level 2 Paper Stamp - Key Moments Accents - Pewter Mini Medley Accents, Wooden Designer Buttons, Designer Ribbon - Green Collection Ink - Desert Sand Re-inker - Cocoa All products are Close to My Heart.

Color Throwdown - Cherish Today

Image
I've always been partial to pinks and browns. So when I saw Wednesday's Color Throwdown I couldn't resist a break from all the autumn colors occupying my palette lately.  Refreshing!  I used these colors with the sketch from Tuesday Morning Sketches .   So Tuesday's Sketch + Wednesday's Colors = Cherish Today! I used all cardstock for this 5x7 card.   The images are from the stamps Love Life (D1482) and the sentiment from 10 Things (C1474).   I used the Art Philosophy cricut cartridge for the cocoa frame then finished the card with a little bling from the Clear Sparkles (Z1104) and a pin from Bling Assortment (Z1466).    I think this might make a great Birthday Card for a teenager girl!

BLOG AWARD!

Image
I'm so excited!  Tonight I'm very honored to have received a blog award!  Thanks so much to Pam Trostle for this award!!  You can check out Pam's awesome blog  here , if you like her creativity as much as I do make sure and follow it!   She's got the CUTEST Harvest Theme on her background right now! Now it is my turn to pass this award on to five of my favorite blogs with less than 200 followers.  If you like their blogs, remember to "Follow" them.  The hope is to help out some of my fellow bloggers, and get a few more followers of my own.  If you see your name/blog listed here, please pass the award on to 5 more blogs that have less than 200 followers.  Here are 5 of my favorite blogs. Kristas Crafty Corner Delightful Stamper Scrappity-Doo-Da Jessica's Paper Petals Scrappy-Grams Designs

Autumn Treat Bag

Image
I made this cute little treat bag with the Art Philosophy cricut cartridge and used the So Grateful stamp for the pumpkin and leaves.    I stamped the pumpkin in Honey ink first and rolled the edges in Goldrush to give it some shading.   I used the same technique on a couple of the leaves with Chocolate ink.  Using only chocolate ink, I used 2nd generation stamping and then rolled the leaf in chocolate.     The strip at the top of the bad is a zip strip from the Dreamin' paper pack.  And my tag, of course, is cut from the Art Philosophy cricut!    This is a FAST and EASY bag that I can fill with candy use as a fun little thank you for a special friend.   I'm also submitting this in the Crazy 4 Challenges this week!  Their challenge was to create anything with a pumpkin!  I saw some really cute ideas there so be sure to check them all out here .

Dreamin' with MoJo Monday!

Image
I LOVED this sketch on the MoJo Monday Challenge blog and I knew immediately which paper pack I'd be using.   Is it any surprise that it would be Dreamin'?  I'm eatin' this pack up and I just might have to order more.  The colors are so rich and fun to work with. I checked the MoJo Monday Challenge this morning before work so that gave me all day to think about how I would go about creating my card.   As soon as I got home I started in on the card, only taking time off to get supper started.   (Fixed burgers, Mac & Cheese - keepin' it easy  - cause I had work to do!) Here is the sketch: And my card!  (5x7) The sentiment if from Hooray Bouquet (that has been my go-to stamp lately! - LOVE IT!)  The antiqued copper charm is from the Harvest Charms set that coordinates perfectly with the Dreamin' Paper Pack.   I used some Mocha Opaque Adhesive Gems on the banner, and don't you LOVE that wide striped ribbon!   This can be purchased in a bulk

Unscripted with H2H

Image
This week's challenge over at Heart 2 Heart is to create a card using only cardstock.  I've been using a lot of Goldrush lately and wanted to change it up a little.  So I chose the colors of Honey, Olive and Desert Sand.  Three of my favorite fall colors.   The other night I pulled out a new stamp - Unscripted  (C1465) and used it for a CAS 4x4 Card (See it HERE ).  I really wanted to use this stamp again.   The pattern I envisioned on my card actually came out the way I wanted!  The pattern for my card is the sketch  " Upright" from Originals . Each colonial white square is 1 3/4 x 1 3/4 but before I cut each square, I cut one piece 7 x 1 3/4 and stamped it.  Then I cut it into the four squares.  The ribbon is from the Honey Mini Medley Accents and I adorned it with Pearl Adhesive Gems. Recipe: Originals - Upright Colonial White CS (for card Base) Cardstock: Desert Sand, Olive, Honey Stamp: Unscripted Inks: Olive, Honey, Goldrush & Desert Sand A

CAS-ual Friday Mini Card

Image
The challenge this week over at CAS-ual Friday is to create a mini-card.   The only rules - must be 4x4 or smaller - and Clean and Simple of course!  It's funny..... this is one of those cards that I thought I already knew what papers and stamps I wanted to use, but by the time I finished, the paper was different and the colors I had started out with were totally set aside and different colors were brought in.   I really like the way this card turned out. 4x4 CARD I used a new stamp with this one - Unscripted (C1465).  I used the 2x2 background stamp in chocolate ink to create the lattice print.  For the flowers, I used chocolate ink on the stamp and then wiped away the ink on each flower leaving the stem still chocolate.  I used a Pacific Exclusive Marker to color each flower.   The image is actually a small 'bundle' of flowers.  I felt I needed more, so I used the masking technique to add more flowers to the bundle. Hope you enjoyed my card!  

An Autumn Card for Friday Mashup!

Image
I found another fun challenge blog!  It is called Friday Mashup .   They give you a choice of 2 challenges or you can 'mash it up' and do both together!  Their challenge this week was to create an Autumn Theme project or create something with Yellow and Orange.  OR, mash it up and create something Autumn with yellow and orange!   Since I'm in such a "Fall" mood this was easy to do! I pulled out my Dreamin' paper pack and my Harvest Happiness stamp and got to work. I used the Arts Philosophy cricut cartridge to cut out the acorn and leaves for my coordinating stamps. I used Goldrush and Honey inks for leaves for my 'yellow' and 'orange' colors. Be sure to visit Friday Mashup for some more inspirations for autumn! Recipe: 4x4 Card - Colonial White Cardstock - X5901 Arts Philosophy Cricut Cartridge - Z1686 Dreamin Level 2 Paper - X7142 Bamboo Cardstock (Included in the Dreamin' paper pack) My Acrylix Harvest Happiness Stamp (C1

A "Ghosting" Halloween Card

Image
I was going strong this week with my creativity and I had a goal to complete all 4 Moxie Fab sketches before the week was out.  I achieved my goal but I think my creativity was waning near the end.  I was not entirely happy with the last card but I wanted to share it anyway since I used a new to me technique.  It's called Ghosting .   How appropriate for a Halloween card! The idea for this card came to me as I was actually trying out this technique on another card I was creating.   That seems to happen to me alot.   Ghosting is stamping an image on a light piece of cardstock with Versa Mark ink and use clear embossing powder to emboss.  Once the embossing is cool, use a sponge and dark ink and rub over the embossed image.   This part I've done many times on artwork.  The shinyness looks cool and ink doesn't adhere to the embossing.   Now... this is the cool 'ghosting' part.   Take a scrap piece of paper and lay it over your embossed image and IRON!  The heat from

Vertical is Elemental!

Image
  I did it!  I said I wouldn't but I did.   I went ahead and created another card when I said I was headed to bed.   But this one is so clean and simple it took just minutes to create!  This is card #3 for the Moxie Fab card challenges.   This time I used the Vertical Sketch. Even though I originally wanted to create a card with pennants like the picture shows, I thought I'd try something a little different.  So instead I used some Elemental Compliments - which are dimensional elements in color! I'm so loving this Kraft cardstock with the Elemental paper.   They go so well together.   I didn't think Elemental would be one of my favorite packs but I really do like working with it.   There are so many options because of 6 different colors and patterns.   The strip centering the Sorbet cardstock piece is  the Zip Strip from the pattern paper.   Our pattern paper now has a 1/2" strip that you trim off the paper. The zip strip contains the paper pack info su

It's Wonderland in Moxie Fab!

Image
I said I was going to attempt to do all 4 Moxie Fab sketches this week and after tonight, I'm half way there! I almost started this one last night but it was getting late.  I knew if I started it, I would be up well past 11:00 pm and I do get up very early for work.  So I went to bed with this sketch on my mind and thought about my idea all day.   Here is sketch #2 -- The Horizontal Sketch And here is my interpretation -- I silver embossed a snowflake onto a 2" square of Crystal Blue Cardstock.   Then I cut it into quarters.  Instead of using the 4th quarter, I used a big Rhinestone Designer Brad.  (Don't you just love that BLING?) My sentiment is also silver embossed.  I added Bitty Sparkles to the snowflake pattern in the paper.   Hope you like it!   Recipe: Cards & Envelopes - White Value Pack X254 Wonderland Level 2 Paper Pack - X7146B Crystal Blue Cardstock (included in Wonderland Level 2 Paper Pack) My Acrylix Snowflakes Stamp - D1480

Die Cuts with Art Philosophy

Image
I came across the Moxie Fab blog a few days ago and they had several card sketch challenges - 4 as a matter of fact!   Each sketch looked fun and I wanted to give them all a try when I had a chance.  I got busy and totally forgot until I saw a card created by my scrappin' bud Mandy. (See her cards over at Scrappity-Doo-Da ).  So tonight I sat down and re-visited Moxie Fab and checked out a few other challenges.  Over at the Heart 2 Heart, their challenge was to create something with die-cuts.  My first Moxie Fab sketch goes well with the H2H challenge so I'm submitting them for both! Here is the Moxie Fab sketch: " Shaped Sketch Challenge " And my card: I used the Arts Philosophy cricut cartridge to cut practically EVERYTHING for this card including the card itself!  I even cut the shaped flowers that I stamped with the Hooray Bouquet stamp.  (The exact measurements are included with the stamp set for perfect cutting) Now, hop on over t

A Birthday with Dreamin'

Image
After creating a few fall cards I suddenly remembered that I needed to make a Birthday card for a co-worker.   Stepping away from the usual bright Birthday colors I went for something a little more in line with the colors and patterns that make me think of September. Close to My Heart's  Dreamin'  paper is perfect for this.   The card pattern is from Originals - First Impression .  The stamp is Harvest Happiness (C1463) stamped in Pacifica ink.  I used the Just Blooms Flutter Paper Shapes (Z1463) adorned with Mocha Opaques Adhesive Gems (Z1333).   Dreamin' Level 2 Paper (X7142B)

Trial and Error = Embossed!

Image
I pulled out my Background - Charmed stampset this morning to create something with the stamp that had pumpkins and vines.   I used this stamp set the other day to make a Halloween card.  You can see that post HERE if you missed it.    I wasn't sure WHAT I was going to do so it took several efforts to finally get to my final product.   Each time I stamped the image I thought of a 'better look' and proceeded to create the idea.   You can see here  - it took me 4 tries to get to the stamped image that I was happy with! I started out with Olive on White Daisy.  Hmmm.... this might look better with Chocolate Ink on Olive Cardstock....  Well maybe Chocolate Ink on Goldrush cardstock.   Still not there!  HEY! How about Cocoa Embossed on Goldrush?  FINALLY. Final Product: I used Elemental paper along with Dreamin' paper for my 5x7 card.  The Elemental Paper just mixes in with any of the other Level 2 Paper packs so well!   I added the chunky chocolate ribbon and a

Crazy For Fall - Creating Cards for Fall

Image
The temperature finally cooled down to a 'fall-like' level this week and this has me yearning for the colors of fall to hurry up and get here!  BTW - when the temperature falls below 62 degrees, I absolutely have to make my first batch of the chili of season.  When I headed home from work on Tuesday it was 59 degrees - So we had Chili for supper! This fall like weather has got me in the mood to make some cards and over at the Crazy 4 Challenges blog the colors to use this week are perfect!  I had my colors, now I just needed a sketch to get me going.  I checked out the sketch over at Clean & Simple and immediately I knew what I wanted to do!  So armed with my Close To My Heart colors and my favorite stamp for THIS week - So Grateful , I got started! Here is my card:  Recipe: White Daisy Die-Cut Card & Envelopes - Z1473 Elemental Level 2 Paper - X7141B Neutral Cardstock Combo (Chocolate) - X5921 Autumn Cardstock Combo (Olive) - X59

A Bewitching Card

Image
This week's challenge over at Pal's Paper Arts is to create something Halloween themed.  So, once again, I reached into my box of new Close To My Hearts stamps and pulled out a stamp that I've been pondering over.   The stamp is Backdrop - Charmed (D1490).  This stamp has two large stamps (about 4 x 2 1/2 in size) that look great but I just wasn't sure how to incorporate them into a card.  I was excited to finally have a chance to work with it and I'm quite pleased with how it came out.  On page 47 of the Autumn Winter Idea Book, the artwork shown uses the stamp as a background stamp on their base page of a layout.   This looks pretty cool but I didn't want to cover up the design.  I wanted to do something to show off the design. I eventually came up with this card: The paper is from Mischief Level 2 paper (X7144B).  I used Sunset Mini Medley accents (Z1338) along with a bit of Black grosgrain ribbon and a Black Button Brad from the Black Min

Base & Shade Stamping with So Grateful

Image
Close To My Heart posted a video showing the Base and Shade technique using the So Grateful My Acrylix stamp .  (I have included the video at the bottom of this post.) This stamp is in my new collection of stamps but I haven't had a chance to use it.  I have been waiting for inspiration. Today I was browsing through my list of favorite challenge blogs  - doing this usually gets my mojo going - and  4 Crafty Chicks  had a cute sketch I wanted to try out.   I had all the inspiration I needed! For my 6x6 card I used paper from CTMH's new Dreamin' Level 2 kit. The Chocolate and Bamboo cardstock is included in the paper pack.  I LOVE these colors.  They are so rich and great for fall layouts and cards.   The acorn tag was cut out with the Arts Philosophy cricut cartridge.  I slipped a piece of sunset pattern paper behind the cut out acorn. RECIPE: Dreamin' Level 2 Paper pack (X7142B) My Acrylix So Grateful (B1395) Antiqued Copper Designer Brad (Z141

A School Layout with Typeset

Image
Close To My Heart's Typeset paper is perfect for those school layouts!  When I finished creating the feature layout from the Typeset Workshop On The Go  (G1024) kit I then set out to create the optional layout.  You can find optional layouts for each WOTG kit on my website under Workshops On the Go.  The cutting dimensions for the layouts are from the wonderful how to book - Magic . I really liked the optional layout shown but I wanted to change it up just a bit to include the Typeset Compliments (X7139B) .   They are just too fun to leave off!  The only 'change' I made to the actual pieces of the layout was to flip the 'postage' piece over to the other side that was cut using the Arts Philosophy cricut cartridge (Z1686).   By changing from the juniper damask pattern to the 'aged' notebook pattern I was able to incorporate many of the compliments. Here is the Original layout as shown: My layout with changes: Other items used on this layout: M