Posts

Showing posts from September, 2012

October Stamp of the Month - A Very Merry Christmas

Image
Welcome to our Stamp of the Month Blog Hop!  This month we are featuring A Very Merry Christmas , a set of 11 stamps.  If you have come here from Pamela O'Connor's Blog you are on the right path!  The blog hop is a great big circle, so you can start here and work your way around.   If you get lost along the way, you'll find the complete list of participating consultant's HERE    We have over 50 consultants participating in the hop. Following the hop is easy, just click on the link at the end of the post and it will hop you right over to the next blog! I love this set!  It has 5 images that coordinate with the new Artiste Cricut Cartridge plus 4 great sentiments.  I made 3 cards and 2 gift boxes with our Pear &  Partridge Paper (X7162B) . For details and close up views on each item, continue reading below. This card was created using the Artiste Cricut Cartridge . (Keys: "q" Card and "Q" Shift Card) ...

Gratitude

Image
Here is a quick card I made.  Well, actually it took me a while to finish, I had a creative block this past week.  It seemed I had all sorts of ideas in my head but I had a difficult time getting it onto paper.  After coloring and trimming my cornstalk a few days ago, everything just stalled and I left it sitting on my table.  Today I was determined to finish so I put away everything I had previously pulled out and started fresh with only the cornstalk. Here is my finished project - FINALLY! I found a 6x6 Die Cut Kraft card (Z1474) that was another unfinished project from another time of creative block.  I used a piece of green B&T paper from the Flirty paper packet (X7160B) to cover up some stamping that was on the card.  I trimmed off the scallop edge of the card and used it as a border under my Burlap ribbon (Z1760) .  The cornstalk stamp is from the set Abundance (D1519)  and was colored with watercolor pencils and a ble...

Fun with Magic Potions

Image
October is JUST around the corner.  Create some fun potion bottles to add to your Halloween decorations this year!  I had fun with the Magic Potions   (C1509) Stamp Set when I was creating items for this year's Extravaganza.  I went to Hobby Lobby and found these cute apothecary bottles at 50% off!  Each of the stamped labels have a perfectly matching image on the new Artiste Cricut Cartridge .  The carrier sheet for the stamp tells which page the image is on in the Artiste booklet and also what size to cut so that the stamp will fit it perfectly!  I stamped each image ink with either Goldrush, Smokey Plum or Black ink and then stamped again with Versa Mark ink.  I embossed them with our Clear Detail embossing powder. I used Moonlight paper pack (X7161B) along with Black and Natural Hemp to accent my labels.  The little owls on the bottle to the left are cut from the Moonlight paper. When I finished, I had to add my own li...

A Belated Birthday Greeting with Pun Fun!

Image
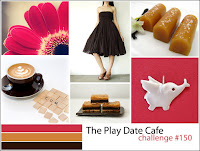
Yesterday I held an all day crop for my StampinHeaven Hostess Club Members.  Just another benefit I provide to my hostess clubs!  I appreciate my Hostess Clubs and like to provide a space and free lunch for my Hostess Club Members to catch up on projects.   We had a wonderful day yesterday and I used the time to work on upcoming projects.  I took a break after a while to do something for fun.  I had brought along some challenges in case I got a chance to try one out.   This card was fun and a bit different from my usual 'style'. I used the colors from The Playdate Cafe and the sketch from Unscripted Sketches to create my card.                                 Here is my card: I used Ruby, Cocoa and Goldrush cardstock.  Usually I have some type of pattern paper on my cards. I didn't like the plain cardstock so I added 5/8" punched circles to the card. ...

Website Sale at Close to My Heart!

Image
I just LOVE it when they add additional products to our While Supplies Last sections of our websites!  You sure can't beat these deals! One of my most favorite paper packs from the past was the Elemental Paper pack.  I loved it because it was  SO versatile.   You could mix and match it with almost ANY other paper!  Where else can you can awesome cardstock quality paper (6 sheets of B&T and 6 sheet of cardstock) for only $2.50!! ****UPDATE 9/21 - This Paper pack is ALREADY sold out!**** (People snatched this deal up immediately!) Elemental Level 2 Paper Packet 6 – 12" × 12" Cardstock Sheets (2 Desert Sand, 2 Olive, 1 Pacifica, 1 Sorbet) 6 – 12" × 12" B&T Duos® Papers (2 each of 3 double-sided designs) $9.95   $2.50   X7141B And that's not all!  Check out some of these other awesome deals! Coordinating Dimensional Elements only $1.50! Elemental Complements Dimensional Elements 2 – 12" × 6" Coordinating...

Family Heritage Part 2 - Memory Showcase Album

Image
Today is part two of my Family Heritage Spotlight on Art that was featured on Jeanette Lynton's blog.  On Friday, I shared the one page layout I created of my Great Grandparents.  If you missed it, you can see it HERE . Today I'm sharing the 6x6 Memory Showcase Album I created featuring my Mother's parents and grandparents and great grandparents!   I used the Avonlea paper pack (X7155B) for the pages in my book.   I love the 6x6 Memory Showcase Albums.  Creating beautiful pages are quick and easy especially when you have compliments such as the Velvet Parlor Rub-ons (Z1742) . For the front of my book I used the stamp set "Family Tree" (D1526) .   I stamped the tree with Chocolate ink onto a 4 1/2" doily in Avonlea White Cardstock.  I used Artiste Cartridge "1" <Accent3> Key.  Next, I cut simple circle in the Chocolate cardstock at 5". Here is a close up the doily.  A paper piercer and small 'pokes' around the...

A Starburst of Encouragement for Friday Mashup

Image
This week's Friday Mashup has a technique I haven't tried before - Starburst Technique.  I thought it made a really pretty design so I wanted to give it a try.   My card is going to a friend who is going through tough times right now.  I wanted to send her words of encouragement and the starburst design to me says "Things will be brighter".  I hope the colors of the card will brighten her day and cheer her up. I used Flirty paper (X7160B) for my card and accented it with Color Ready Wooden Arbor Shapes (Z1765) and a flower from Just Blooms Floret Paper Shapes (Z1764) .  The Olive ribbon is from the Mini Medley Accents - Olive Collection (Z1489).  The sentiment is from the W ords of Comfort stamp set (C1524) . Here is the Friday Mashup Sketch : The instructions for creating the starburst can be found here .   I altered mine just a bit because the card I was making was a little bit larger (4 1/4 x 5 1/2) than the one is the demonst...

Family Heritage - Spotlight Feature

Image
I was so excited and thrilled today to get an email from Close To My Heart's Corporate office notifying me that my art was being featured on Jeanette Lynton's blog!  It is such an honor to be recognized!  I'm am always so in awe by the creativity of my fellow consultants and Close To My Heart's very own Art Department, that being spotlighted by Jeanette just blows me away.  It has been an exciting year for me and my art. I'm going to share a little more detail over the next couple of days on the pieces that Jeanette featured.  Today, I'll share my most favorite piece - the one page layout.   I used the one-page layout sketch from the new Make It From Your Heart.  (Sketch #17) This is a picture of my Great Grandparents, Anna Katherine and Fred Schneider.   So many memories came back to me as I worked on this layout.  I never knew my Great Grandfather. He died at a fairly young age even before my own father was born.  I did have the plea...

Organizing My Ribbon - New Craft Organizer

Image
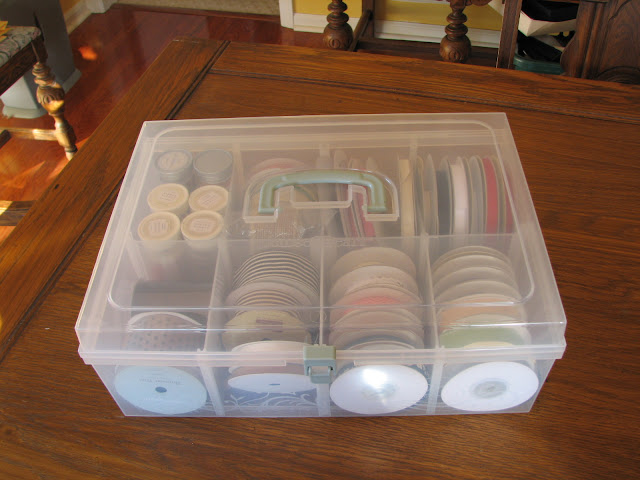
I have tried several different ways to organize my every increasing inventory of ribbon.  First, I put my ribbon in one of those organizer boxes from Wally World but I quickly outgrew that.   Next I had my husband put a ribbon rod on the wall behind my work desk.   But then it became a pain to take 4, 5, 6 rolls off to get the ONE roll that I needed to take with me when going to a workshop or crop.  PLUS, there were several rolls that constantly unwound on their own.  I'd turn around and half the roll would be spilling onto the floor.   One day, not too long ago, I accidently knocked the entire thing onto the floor.  That was the last straw.  I was busy and didn't want to fool with winding all the ribbon and re-spooling them onto the rod so I threw them all in a small plastic box near my desk.  So, there they sat for weeks, jumbled together and I could no longer tell what I had. Today, my solution came!  I'm so excited!  I ordered...