Posts

Showing posts from June, 2012

Live Out Loud - July Stamp of the Month

Image
Welcome to our Stamp of the Month Blog Hop!  This month we are featuring "Live Out Loud", a set of 8 stamps.  If you have come here from  Doreen's Blog  you are on the right path!  The blog hop is a great big circle, so you can start here and work your way around.   If you get lost along the way, you'll find the complete list of participating consultant's  HERE    We have over 50 consultants participating in the hop. Following the hop is easy, just click on the link at the end of the post and it will hop you right over to the next blog! This month you can get a Perfect Pair when you purchase $75 in products on my website!  Every 4-5 days the Perfect Pair will change to a different paper pack and coordinating embellishment.   For all the details on our Perfect Pair special, see my Perfect Pair tab HERE .   To promote this special,  I'm going to feature a new card using this stamp along with the Perfect Pair being offered during the month of Jul

LAST DAY to Buy 2 Stamps and Get 1 FREE!

Image
This is it!!   Today is the LAST DAY to purchase 2 stamps and get one FREE!   This is such an awesome deal - how can you pass it up! Here are some sample savings and how to add the Stamp of the Month - Life is Tweet for just $5 more!   *Stamp of the Month can be purchased for $5 when your order total reaches $50. JUNE STAMP OF THE MONTH - LIFE IS TWEET NOT AVAILABLE AFTER JUNE 30TH! NOTE:  Free stamp will be equal or lessor value than your lowest priced stamp you are ordering. 1. Order 2 E-size stamps (These are great Alphabet stamps) you could choose another E-size stamp for FREE.  (Value $29.95).   Your order total would be $59.90 so you qualify to get the Stamp of the Month for just $5!   That is a total savings of $47.90!   2.  Order 1 E-size ($29.95) and 1 D-size ($17.95) and choose a D size stamp for FREE (Savings $17.95) Order total $47.90 (before shipping and tax).  You are just $2.10 away from getting the Stamp of the Month for $5.   So go ahead..... add a

2 Days Left for Stampaganza & Retiring Items

Image
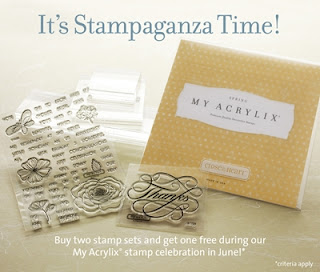
There are only 2 days left to take advantage of our Stampaganza Special!  For every TWO stamps you purchase you will get ONE stamp of your choice for FREE!  (of equal or lower value).   Choose from A, B, C, D and E-size stamps! Don't miss this sale!  If you have some favorite on your list get them now at this great deal! Start shopping now!  Go to my website HERE. RETIRING ITEMS!!! There are many wonderful products that will be retiring at the end of this Spring Summer Idea Book to make way for EVEN GREATER products!   I've posted which kits, papers, stickease and compliments will not be available as of August 1st on my Retiring Items page HERE .  Be sure to check it out.   If something you've been wanting to get is listed, you will need to get it before July 31!  More items will be announced soon so be sure to check this page often!

Banner's Made Easy - PLUS a few updates!

Image
Hello!  I'm back from vacation!  I hope you enjoyed my Studio J posts while I was gone. I learned alot doing that little 'homework' assignment for convention.  I'm sure I'll learn a few more tips while in Dallas for our Close To My Heart Convention in July. I'm still working hard on my Extravaganza presentation for convention but I took some time out yesterday to create some cards for July's Stamp of the Month - Live Out Loud.   I've got something special lined up to show off this fun set so you will need to check my blog about every 4-5 days to see a new card to go along with next month's special - Perfect Pair!   Next month, Close To My Heart is offering a Perfect Pair - a paper pack and a coordinating embellishment - for F REE with every $75 order on my website!  About every 4 or 5 days the Perfect Pair will change.   I'll post the schedule of Perfect Pair offerings on my Special tab very soon.  Be sure to come back to my blog on July 1st

A Tribute - Studio J

Image
My last and final layout of the Studio J 5-pack that I have been working on is a tribute to my late Father-In-Law.   I created the layout before I knew what pictures I was going to use.  I really liked the colors and look of this layout.   The more I worked on the layout the more it reminded me of my Father-In-Law.  He LOVED to hunt and fish.  So I decided to make this layout a tribute to him! The technique that I learned creating this layout is using ribbon tabs to make a pleated ribbon.  I placed a ribbon tab on the right page and rotated it 90 degrees.  Then I copied and pasted the tabs all across the page.  I love how the stitching makes it look like I sewed the pleated ribbon in place! The text box on the right page has a stickease tag in it.  I rotated and enlarged the tag and cropped one end.  Next, I added another journaling box on top of the tag so that I could journal right onto the tag.   The strip across the star on the right page is actually a My Stickease Border.  

Something Sweet - Studio J

Image
Now here is a layout that you just won't BELIEVE what kit I started with!  I'll show you my finished layout first this time! This is me and one of my convention roomies - Sharon Ivanauskas taking a lunch break at last year's Close To My Heart Convention in Disneyland, California.  What great fun we had! On this layout, we turned out pages around.  The left page was rotated 90 degrees and the right page was rotated 180 degrees!  This is easy to do, just click on the round arrow at the top corner of the page (see below).    Next I changed the colors of the papers! Here is what I started with: After changing the Grey cardstock to Lagoon, I lightened the color by adding a journaling box to cover the area and chose 'vellum' as my background paper for the text box.  (NOTE:  Journaling boxes will have "Add journaling" in them.  You must highlight this and hit the space bar to delete it) Now, I bet you are wondering.... where did those cute little cupc

The Best Game - Studio J

Image
Time for Layout #3 of my five Studio J layouts that I created for this year's Close To My Heart convention in July.    This is another of my favorites!  On this layout we learned how to use letters as embellishments, added "tabs" of cardstock with journaling boxes, and used My Stickease to make a scallop border! For this layout we chose the Lucky kit and Portrait Collection Pattern.   Here is what the layout looked like before I began making changes. For my layout I changed the green argyle paper to Grey Flannel cardstock.   I also changed the shade of the blue pattern paper.  I changed the Colonial White cardstock to White Daisy. I used journaling boxes to create the big red tab at the top left and bottom right.  Next I added another text box on top of the red tab and typed an "O" using the Cobbler font at 113.  I placed a circle stickease inside the "O".   My scallop border is a circle stickease cropped and tucked under the ribbon.  I c

Sassy and Beautiful - Studio J

Image
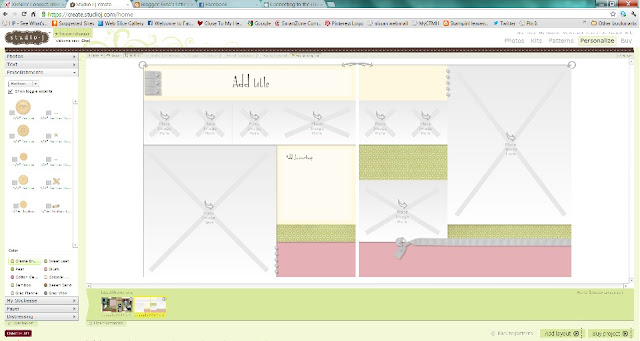
Today I'm going to share another Studio J layout.   This is the 2nd of five FREE layouts that I got to create for attending the Close To My Heart Convention in July.  In this layout, we learned how to delete photo wells, used text boxes to cover up portions of the pattern and cropped stickease borders to make ribbon streamers. For this layout we chose the Lucy paper and selected the Stars Above pattern.   Here is a picture of the layout before I started making changes to it. One of the first things I did before beginning the layout was 'turn off' the toggle accents.  This will delete the accents that are already placed on the layout.  See the 'greyed' ribbon and brads on the right page?  Turning off the toggle accents makes these disappear and I can place my choice of accents anywhere on the page!   (This button is just under the "Embellishments" on the left side) This layout is designed for 9 pictures.  But I only had 3 pictures to use on this la

Fabulous Four - Studio J

Image
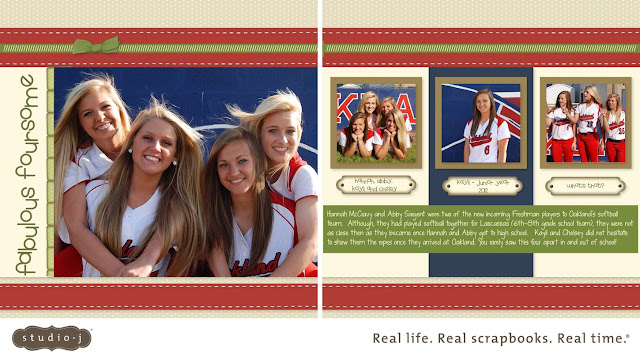
WOW...... I just can't keep up right now!  My poor little blog has been so neglected because I've been so busy!   I did take a break the last two evenings from my Extravaganza Creating to work on some Studio J layouts.   Everyone attending this year's Close To My Heart Convention got a FREE 5-pack to Studio J.   I love Studio J but I love hands on paper crafting too so it's been a little while since I've worked in Studio J.   After convention I had planned to scrapbook my daughter's Junior year softball season in Studio J.  So this really came at a good time! It's a lot more fun to do these layouts in Studio J rather than actual scrapbooking.  I don't know why - I guess because I feel like I'm doing the same layouts year after year.   Not much changes with softball! Along with the FREE 5 pack they sent us instructions for completing the 5 layouts - to teaching new techniques and some really cool things your can do in Studio J!  I'm going to sha

Another Life is Tweet Card

Image
I've been so busy working on my Extravaganza project for this year's Close To My Heart convention in Dallas, that I haven't had time to do any creating that I can share!   Oh I'd LOVE to be able to share what I'm creating but that will have to wait until AFTER I return home from convention.  This is going to be an AWESOME 2012 Autumn Winter Idea Book!  I can't wait until it is released!  I can't..... but I will. So in the meantime, I'm going to share one of my Clean and Simple cards from this month's Stamp of the Month, Life is Tweet. I used the Art Philosophy cricut cartridge to cut the scalloped circle in Sweet Leaf cardstock.   I cut another circle a bit smaller in White Daisy cardstock and stamped the bird onto it with Smoothie ink. I stamped the party hat separately and cut it out to attach to the bird's head.  The ribbon is from the Smoothie Mini Medley accents and matches perfectly!   Ok, I'm headed back to my craft room

Birthday Card with Life is Tweet

Image
Here is another card I made a few month's ago with this month's Stamp of the Month - "Life is Tweet". This was one of my entries for my application teach at this year's Close To My Heart Convention in Dallas, Texas.   For this card I used the Colonial White Die Cut Cards and Envelopes (Z1738) .  These tri-fold cards are 3 1/2" x 8". I love the die cut flap for these cards.   I used paper from the Florentine paper pack (X7153B) and Olive cardstock as my base. I used the Color Ready Seam Binding Ribbon (Z1732) and dyed it twilight to match the color of my bird.  I stamped the bird onto a piece of the B&T paper from the Florentine paper pack.   I made a ribbon flower for my flap by twisting it as I adhered it to the stamped flower that I cut from the Florentine paper.   Here is a closer look: I 'faked' stitching around the pattern pieces and the border of the card by using my ruler and a paper piercer.  Once I pierced th